

Why Growing Microgreens at Home Makes Sense for Indian Homes
- Microgreens are edible young seedlings packed with nutrients much richer than fully grown vegetables.
- They require very little space, can grow in shallow trays or containers ideal for apartments, balconies, or small indoor spaces.
- They grow quickly many varieties are ready for harvest in 7–14 days.
- Growing at home means you get fresh, pesticide-free greens any time of year not dependent on seasons, soil plots, or even sunlight.
Given limited balcony or indoor space which is common in Indian cities microgreens are an especially practical and nutritious option.
What You’ll Need to Get Started
To grow microgreens at home you need only a few basic supplies:
- Seeds: Choose seeds meant for microgreens e.g. mustard, fenugreek, radish, sunflower, peas, broccoli, etc.
- Growing tray or shallow container with drainage holes (even repurposed containers work).
- Growing medium: light potting soil, coco-peat, or hydroponic mats. Soil-free or soil-based mediums both work; for beginners, soil or coco-peat is easiest.
- Spray bottle: for gentle watering / misting. Useful because microgreens are delicate avoid heavy watering.
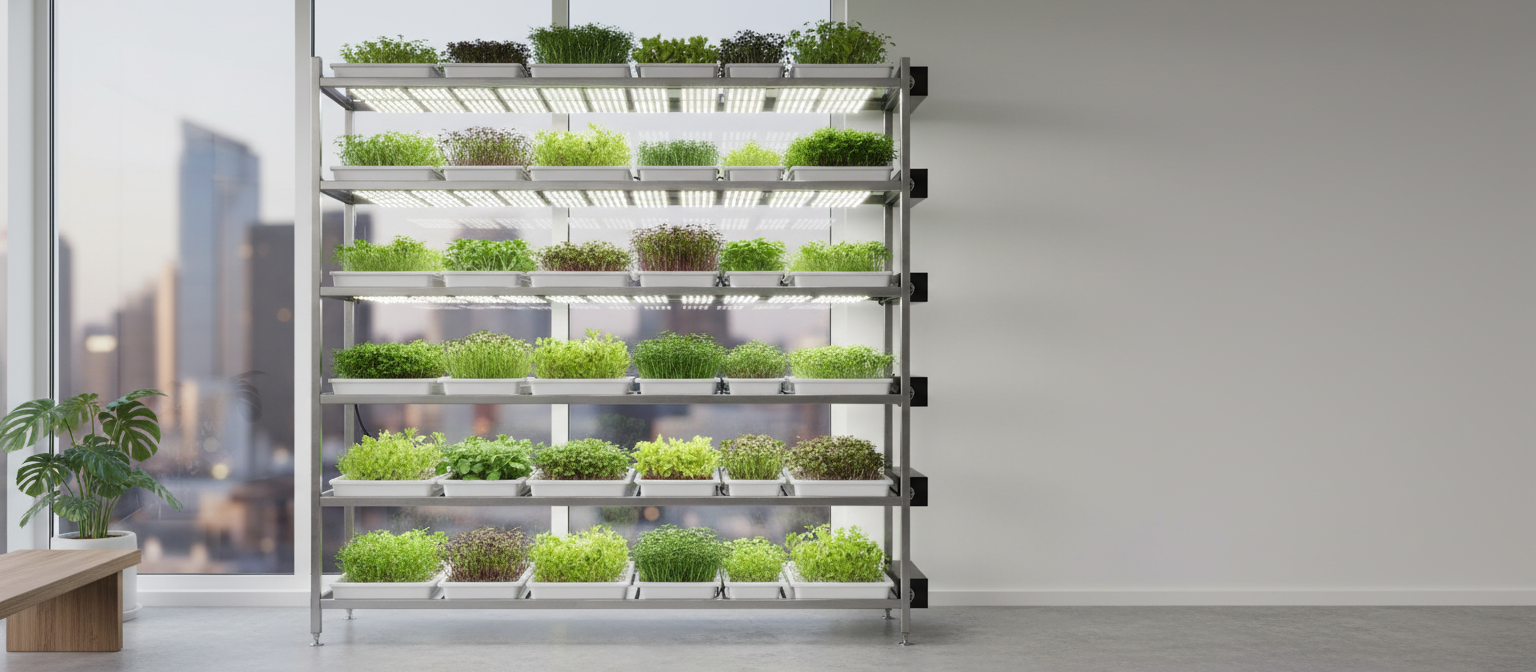
- Light source: either natural sunlight (if you have a bright window or balcony) or LED grow light, especially helpful if you have limited sunlight. This is where full spectrum microgreen grow lights India / microgreen grow lights for home / balcony gardening grow lights come in. That’s essentially all you need: simple, low-cost, and easy to set up even in small urban homes.
Zen Seedsbank has an excellent collection of grow lights for beginners to professionals alike.
FireFly Tube Light – 15Watt * Sparkler Tube Light 25Watt * Home Gro wide batons – 25 Watt * Peacock Gro Pro wide batons – 50 Watt * Harrier Lights 100w
Step-by-Step: How to Grow Microgreens at Home
Step 1: Prepare the Tray & Medium
- Fill your shallow tray with ~1–2 inches of your chosen medium (soil / coco-peat / hydroponic mat).
- Level it gently so the surface is even and loose don’t compact it too much.
Step 2: Sow the Seeds
- Scatter seeds evenly over the surface don’t overcrowd, but aim for a dense layer for a full tray.
- For some seeds (like peas, sunflower), you may soak them overnight before sowing helps with germination.
- Lightly press seeds into the medium (don’t bury them deep), then mist gently.
Step 3: Germination Phase
- After sowing and moistening, cover the tray (with lid, another tray, plastic wrap or similar) to create darkness and humidity. This helps seeds germinate evenly.
- Keep the medium moist (mist as needed) don’t overwater! Too much water = risk of mold / root rot.
Usually within 2–5 days you’ll see sprouts emerging.
Step 4: Light & Air: Switch to Grow Lights or Sunlight
- Once sprouts emerge, remove the cover. If natural light isn’t enough (e.g. in a room or shaded balcony), place the trays under a good full-spectrum microgreen grow light. This ensures balanced growth irrespective of outdoor sunlight.
- Provide about 12–16 hours of light per day many growers use LED grow lights for a consistent schedule.
- Make sure space is well-ventilated airflow helps prevent mold and fungal problems. Step 5: Watering & Maintenance
- Mist or lightly water daily (or when surface feels dry). Soil should remain moist but never soggy.
- Avoid overwatering drainage is key. If tray has holes use them, or raise tray slightly so water drains.
Step 6: Harvesting Your Microgreens
- Depending on the variety, microgreens are typically ready in 7–14 days when they have their first true leaves and are ~2-4 inches tall.
- Use clean scissors or a knife, cut just above the soil line. Avoid pulling to preserve roots (if you plan to regrow).
- Rinse gently (if required), pat dry, and store in an airtight container/refrigerator if not using immediately. Home-grown microgreens tend to stay fresh for several days.
Suggested Read: Indoor Grow Lights India – Best LED Grow Lights for Hydroponics & Indoor Farming
Why Full Spectrum / Grow-Light Based Growing Works Great Especially in Indian Homes
- Many Indian homes especially apartments don’t get consistent, strong sunlight, or have small balconies; full spectrum microgreen grow lights India / microgreen grow lights for home / balcony gardening grow lights give you control over light, independent of weather or season.
- Grow lights ensure consistent growth cycles ideal if you want to harvest fresh greens frequently (e.g. every 10–14 days) regardless of monsoon or winter.
- Because microgreens don’t need very high light intensity (unlike fruiting or flowering plants), a modest full-spectrum LED setup is often enough making it cost-effective and energy efficient.
- For urban dwellers with small balconies or kitchen shelves, using grow lights transforms even little unused space into a productive microgreens garden perfect for daily nutrition.
Best Microgreens to Grow at Home (Beginner-Friendly & Quick)
Here are some of the easiest and most popular microgreens to start with:
- Mustard and fenugreek quick germination and flavourful leaves.
- Radish crunchy, spicy microgreens.
- Peas, sunflower protein-rich, sturdy shoots.
- Broccoli, etc. nutrient-dense, great for salads and cooking.
- Herbs (coriander, basil, etc.) if you like fresh flavours on sandwiches, salads, curries.
Because of the fast growth cycle, you can experiment with different seeds every week or two it’s a flexible, low-risk, high-reward home gardening option.
Common Mistakes to Avoid
- Overcrowding seeds: Leads to poor air circulation → mold, weak growth.
- Overwatering / Poor drainage: Waterlogging kills roots; always ensure drainage and moderate moisture.
- Insufficient light: Without enough light, microgreens become pale, leggy, and weak that’s where proper grow lights help. a
- Stale, stagnant air / no ventilation: Leads to mold or fungal issues keep a window or light airflow.
Final Thoughts Grow Fresh Greens at Home Year-Round
Growing microgreens at home in India is one of the easiest, most satisfying ways to bring fresh, nutritious greens to your table especially if you live in an apartment or have limited outdoor space. Whether you use natural sunlight or balcony gardening grow lights / microgreen grow lights for home / full spectrum microgreen grow lights India, the results can be vibrant, healthy, and fast.
Start with simple seeds like mustard or radish, set up a small tray with soil or coco-peat and a modest LED grow light, and in just about 1–2 weeks you’ll have your own homegrown microgreens ready for salad, sandwiches, or curries. It’s an easy, low-cost, high-reward hobby, and a great way to eat fresher and healthier food.